

Whether you buy from a seller or consider making your own pins, you likely have several support types to choose from, each with its own advantages and disadvantages. There are several common backing types you can find on pins, either the secure locking type or the less secure standard backing option. But which backing type is best? Don’t worry, in today’s guide, we’re going to talk about the back of an enamel pin. Includes what an enamel pin back is, types of enamel pin backs, and FAQs. Read on to learn more.
1. Knowing your enamel pin backs
From jackets and shirts to bags and wallets, pin attachments keep your custom pins securely attached to most materials. However, they are often overlooked during the design process. Because designers spend so much time adding line detail and color to custom pin designs, it’s often overlooked which pin back is the best option for keeping it in place. Proper pin attachment can determine the perceived quality of your pins that otherwise will wear out.
Some pin attachments are more secure and suitable for rough wear on bags or coats, others are easier to display on fabric surfaces, and still others make pins appear more elegant and valuable. Consider giving your pins the right support to help take your product to the next level and create a higher-quality product. In this blog, we’ll look at the most popular pin attachments and how they differ.
(Another related product guide: Enamel Pin Back Buying Guide)
2. Different types of enamel pin backs explained
Below are the different types of pin backs explained.
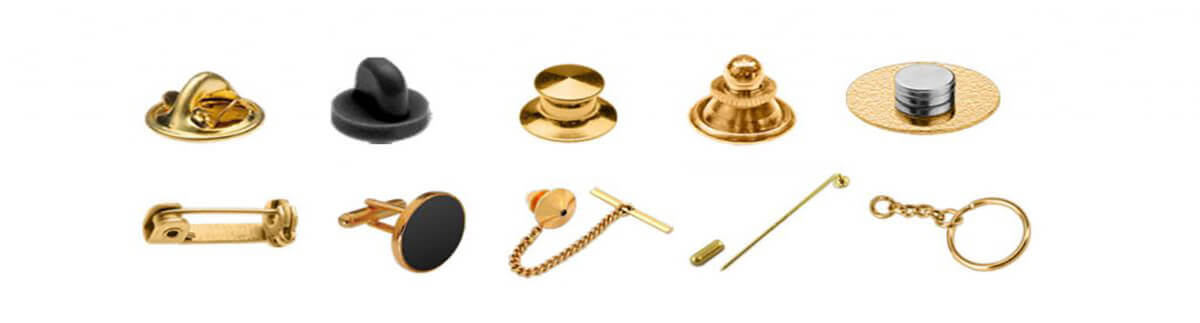
1) Butterfly Clutch
Butterfly clutches are so named because they feature two flat pieces of metal that represent butterfly wings. These “wings” grab the stem of the pin, apply pressure, and hold the backing (and hopefully the pin!) in place. To add or remove a butterfly backrest, you simply squeeze the “wings” together to release their grip on the uprights, allowing them to slide easily on or off the pins.
They’re a fairly common type of support, especially on pins found in brick-and-mortar stores or sold by charity volunteers, but I’ve never really trusted them. Metal wings can be very fragile and the entire wing can easily be pulled off with just a little force.
2) Rubber Backplate
Rubber clutches, which are easy to put on and take off, are another popular pin attachment that tightens and releases the pin by simply pushing it into the tip of the pin. In recent years, they have become increasingly popular with the rise of enamel pins and can come in different colors to match the plating or paint details of the pin. The rubber clutch is one of our two standard accessories for a more comfortable fit with pins that sit against your skin.
3) Jewelry Clutch
Jewelry clutches feature a metal locking mechanism that locks onto the pins, making them secure more securely than butterfly clutches or rubber clutches. To install a jewelry clutch, simply push the metal block of the clutch up, then slide the needle into the needle hole and release. These clutches are popular for their elegant design and the ability to securely hold most fabrics or protect the wearer from bumps.
(Another related product guide: Materials of Different Types Enamel Pins – A Complete Guide)
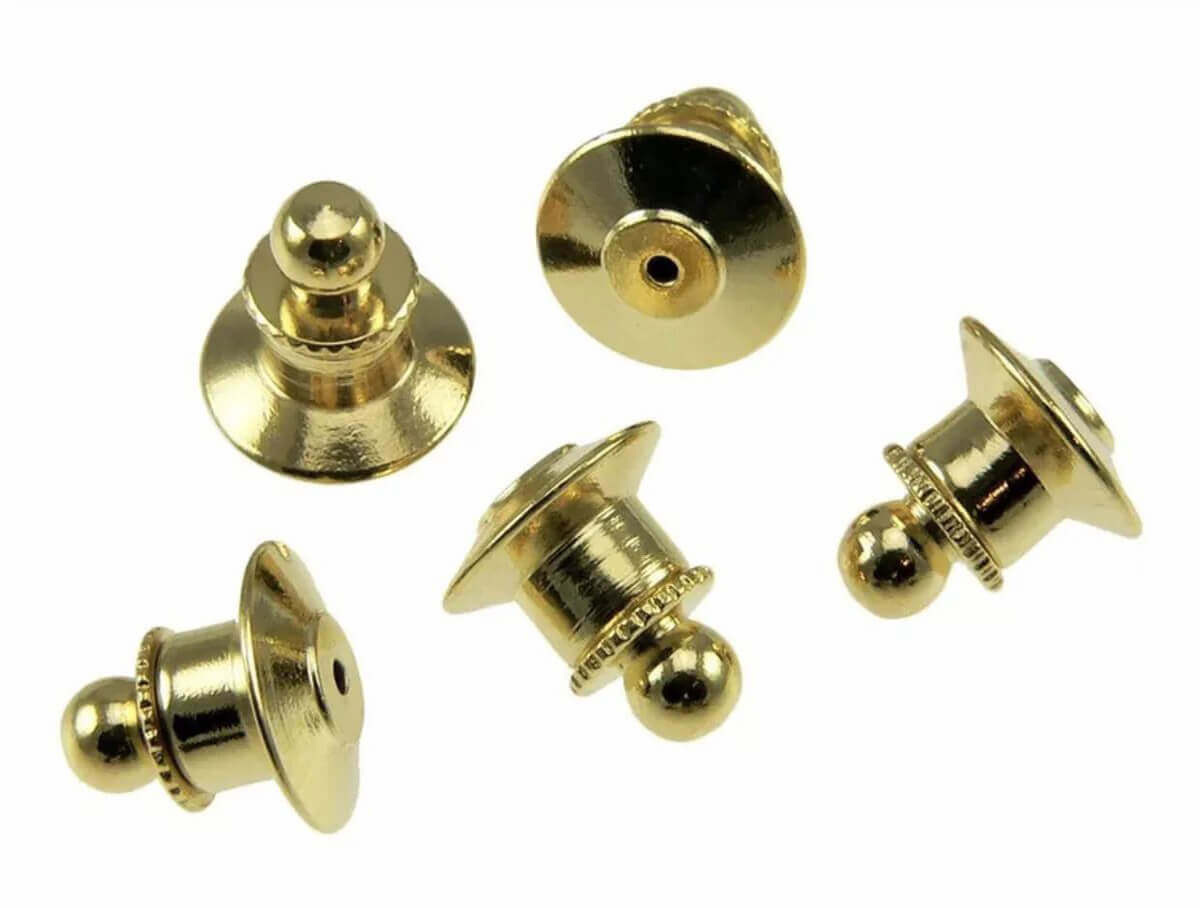
4) Deluxe Clutch
Similar to jewelry clutches, deluxe clutches (also known as flat lock clutches) have an internal locking mechanism that clamps the tips of the pins to hold the pins in place. Deluxe clutches are extremely secure and ideal for attaching to outerwear, such as jackets, or surfaces that may receive rough treatment, such as book bags or purses.
5) Magnetic Backing
This type of backing is best for securing the pin to thinner materials and consists of two magnets, one installed in the pin itself and the other used to help it adhere to the material.
Technically speaking, magnetically supported pins are not pins in the traditional sense but instead rely on the attraction between two magnets to hold them in place, rather than piercing fabric or material to hold them in place. The magnetic backing allows you to attach the pins to clothing and other surfaces without poking holes in the material.
6) Safety Pin
Similar to attachments for buttons and safety pins, most people are probably familiar with using this type of pin backing and sometimes prefer it because losing an implanted safety pin is much more difficult than losing a removable safety pin. clutch.
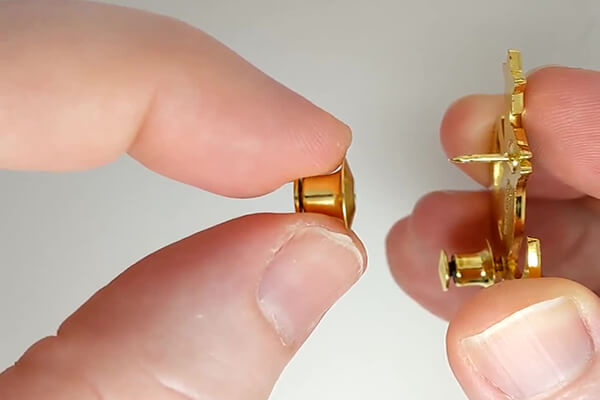
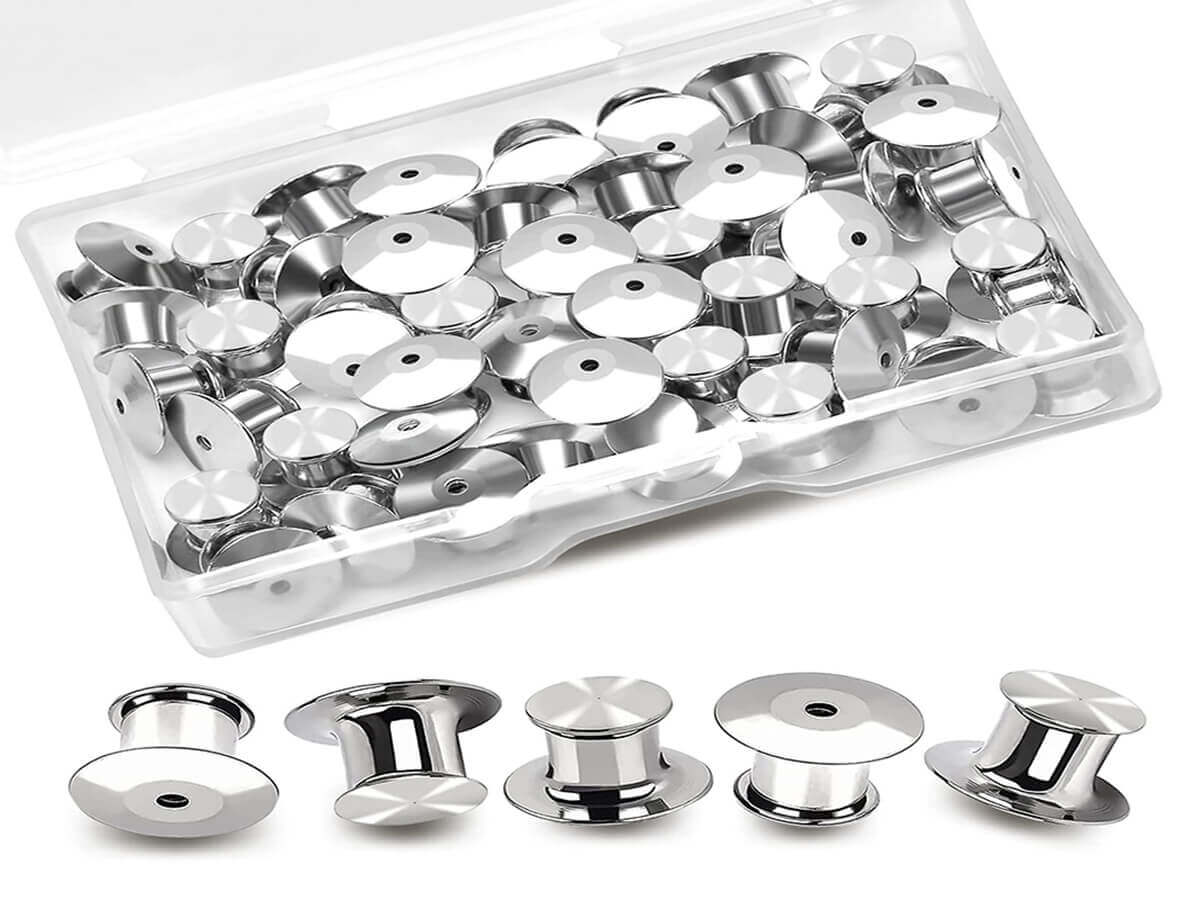
7) What is a locking enamel needle back?
Locking Pin Backing is just that, an alternative to the standard backing on enamel pins that “locks” your pins in place, making them more secure. They are sometimes called “pin holders” or “safety pinbacks”. Their sole purpose is to replace standard rubber or butterfly backings and hopefully prevent you from losing your beloved enamel pins.
I highly recommend you consider purchasing some, especially if you pin them to your bag or jacket. If your pin has multiple posts (the part of the pin that is actually pointed on the back) then you can usually just use a locking backing to secure it, but for extra security, I recommend replacing all backings with locking pins. There are actually several locking back types you can buy, tool-applied clamp backs, and deluxe clutch locking backs, which are (in my opinion) superior.
8) Clamp lock back
Clamp-locking back plates can be very secure if installed correctly. Apply them by tightening the screws holding the dowel rods in place using a hex tool. However, I’ve never used them myself as I’ve always been put off by a few reviews in the past saying they often didn’t sit properly, causing them to wobble and lose themselves while working.
Clamp locks are also more expensive than other options and require you to carry a hex wrench with you to add and remove pins. All in all, the extra cost, extra effort, and inconsistent locking technique make me personally avoid this style entirely.
(Another related product guide: Enamel Pin Backing Cards:A Full Guide)
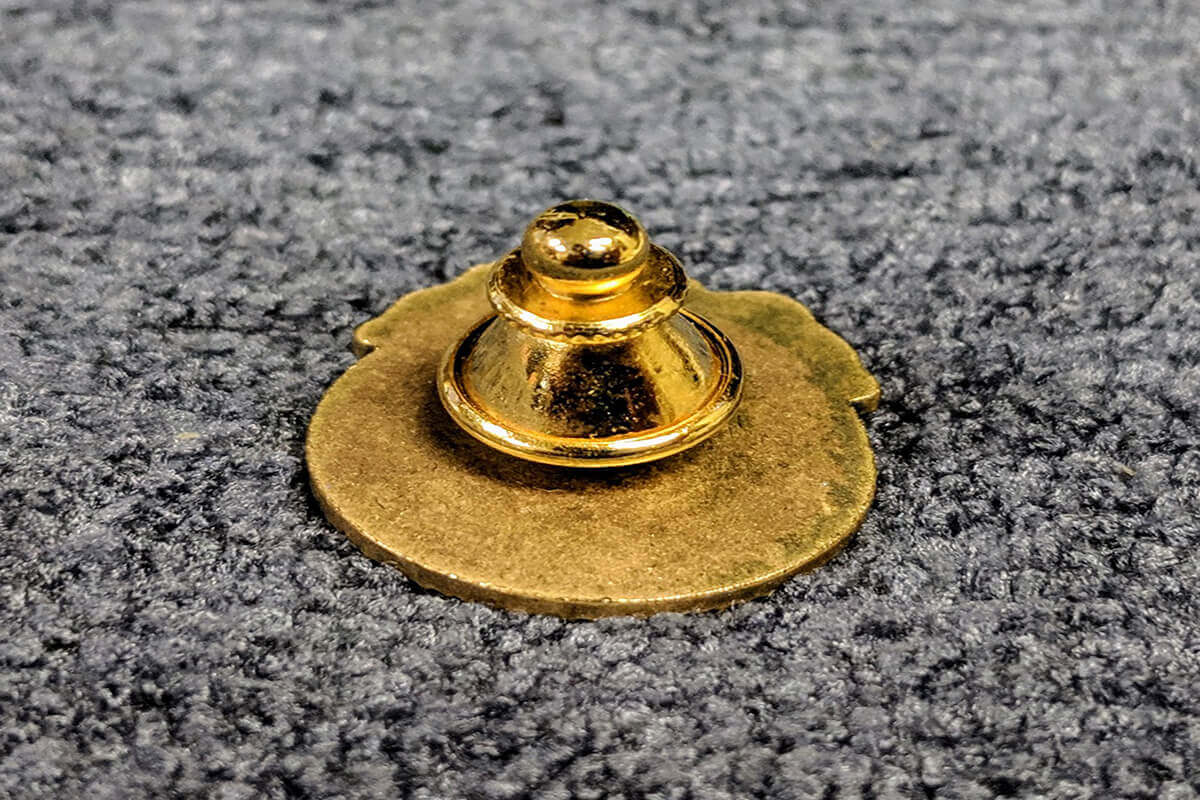
3. How does the back of the lock pin actually work?
I’ve often wondered what’s going on on the back of a safety pin. This sounds like a simple question, but I can’t find the answer. So, I decided to take a few lockbacks apart and try to figure out for myself how they actually work.
It turns out that it’s actually a very simple mechanism, essentially just a ball and a spring that applies tension to a pin rod. When you insert the pin into the backing, it forces the ball against the sides of the inner post, rolling as the post moves up. Eventually, the post is inserted far enough into the backing that the ball rests in the notch in the post, releasing the tension within the inner post and allowing the spring to push it back into place.
Now, any attempt to pull the entire back will simply put more pressure on the ball, increasing its grip on the post and locking the pin firmly in place.

(Another related product guide: How To Clean and Maintain Enamel Pins)
4. How do I re-add the locking pin?
To secure the locking back to the pins, you simply press lightly on the lower lip of the backing.
important! Do not press directly on the top of the lock back. You will prevent the clutch from moving and it will seize!
Instead, place your fingers on either side of your lower lip and press gently. As the clutch moves inward, the top protrudes slightly and snaps into place around the head of the column. Once the clutch support is in place, the top will remain slightly protruding, indicating that the clutch is engaged. Pull it gently to check that it doesn’t slip off the stem. It’s fine if it rotates around the post, but it shouldn’t shake or move the slider. If so, remove it, apply another backing, and check again.
(Another related product guide: How to DIY Enamel Pins at Home?)
5. How to remove the locking pin?
To remove the lockback from the pin, simply grab the lower lip of the backing while pulling on the top. The clutch should disengage, releasing the grip on the pin and allowing it to slide off.
6. My rear lock is stuck! what do I do?
First of all, don’t panic! In fact, it’s very common to find that the lock back appears to be stuck. I test every lockback I send out in my order and I assure you I manage to remove every lockback that is “stuck”.
If you’re having trouble removing the locking pin, here are some tips you can try:
(Another related product guide: How to Design Backer Cards for Custom Pins)
1) Tip 1: Gently press the lower part of the backing
Sometimes the clutch doesn’t disengage properly, causing it to appear to be stuck. Try gently pressing on the lower lip of the backing to push the stem further in and reset the clutch mechanism inside before trying to remove it again.
The top of the lock back is flush with the lower lip may indicate that it is not installed correctly.
2) Tip 2: Pull gently but firmly on the entire backing
If pressing the clutch further doesn’t work, just try the opposite. Pull the entire backing back slightly to reposition its height on the post. This may be enough to re-engage the clutch properly and allow it to move freely within the lock.
3) Tip 3: Try twisting the lock back around the uprights
Often the plating on the pin increases the thickness of the post, causing it to fit more tightly into the back of the lock than intended. Gently twisting to remove the plating can help loosen the lock’s grip.
4) Tip 4: Check whether the column is bent
If the post on the back of the dowel is not straight, it will affect the operation of the backing. You should be able to gently bend the entire post a little, straightening it a bit and allowing the clutch inside to move.
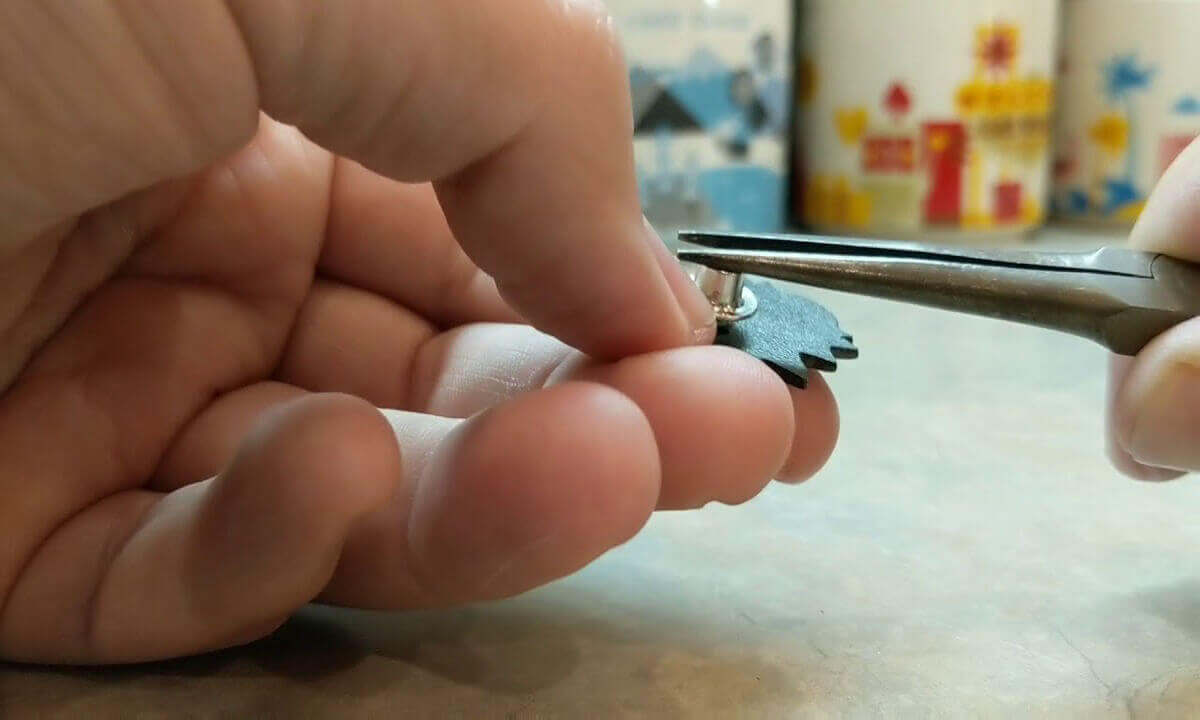
5) Tip 5: If all else fails, use brute force
If nothing else seems to work, it’s time to grab a pair of pliers and forcefully remove the backing.
NOTE: This is a last resort as we may permanently damage the backing and possibly the enamel pin itself! Only do this if you really need to remove the backing.
I recommend placing a piece of cloth between the pliers and pins to protect the enamel. Carefully hold the flat part of the enamel pin with your fingers, then use pliers to grasp the top of the backing while gently pulling upward. If you’re lucky you should force the ejection, but it’s also possible that you might also pull the entire inner column of the lockout, at which point the lock is destroyed. Broken backing can be recycled as scrap metal, so be sure to dispose of it properly.
(Another related product guide: Top 10 Enamel Pin Manufacturers in 2023)
7. Conclusion
That’s all the relevant knowledge about enamel pin backs summarized in this guide. Often, people only notice the surface of an enamel pin and ignore its back. In fact, the back of the enamel pin is the key to supporting the use of the enamel pin. I believe that by reading this article, you will have a better understanding of enamel pin backs.