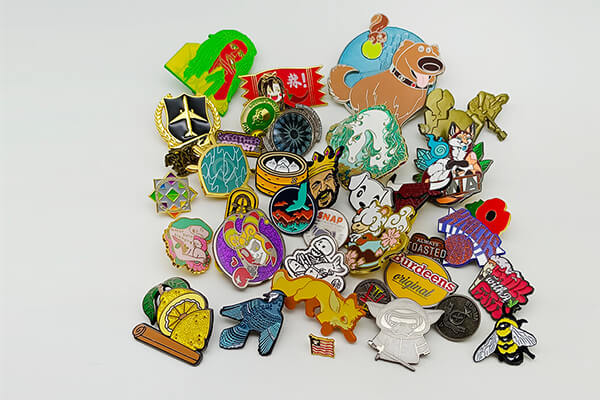
Lapel pins are a versatile, understated, and classic way to announce partisan affiliation, group membership, fan loyalty, or your support for a cause. Almost everyone is familiar with red or pink AIDS and breast cancer awareness pins; they have become a global symbol of these diseases, as well as a means of raising money for research. Businesses often use them for employee recognition programs and promotional items.
Besides being elegant and simple, lapel pins can also be sophisticated and colorful. Entire subcultures have sprung up around collections of badges due to their symbolic value and variety in style and theme. The Walt Disney Company had very detailed and strict protocols around their pin deals.
1. History of Lapel Pin
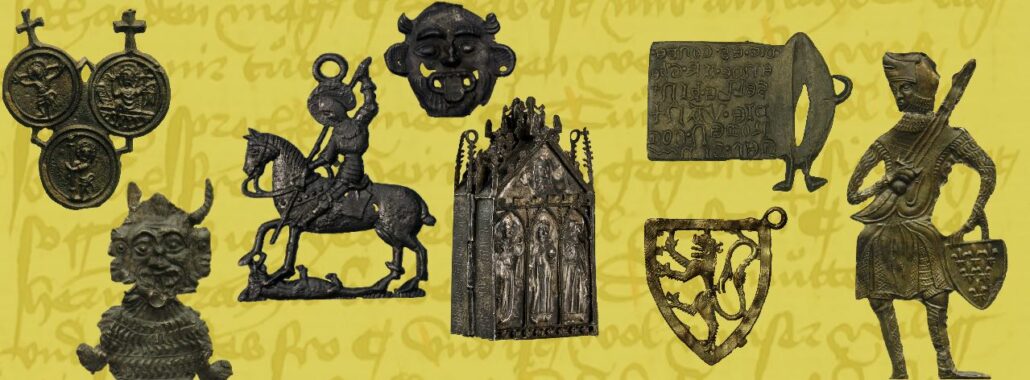
Historically, brooches have been associated with the military and political worlds.
- The first appearance dates back to the Civil War when both sides used them to identify different units.
- Medals and pendants often accompanied symbols of merit and distinguished service during World War I.
- These pins eventually spread to police and fire departments, and eventually to government agencies, such as the CIA and FBI.
These types of military and other service pins are often passed down to families as meaningful heirlooms. Due to their historical significance, they have also become highly sought-after collectibles. The trend of badges moving from military and government agencies to political and other affiliations hasn’t taken much of a leap but continues to be popular with political and social groups.
- A recent example is the proliferation of American flag pins after 9/11. These pins are popular not only in the United States but around the world as a symbol of sympathy and solidarity with the American people in times of grief.
- A notable historical example is the wildly popular brush, which became a powerful symbol of the Chinese Communist Party in the 1960s and 1970s.
Today, pins are widely worn, traded, and collected, and not just as political, military, or social symbols. Traditionally a distinctly American hobby, collecting brooches has become a global phenomenon. It is now possible to wear pins to show support for a favorite band or sports team, to celebrate a beloved character, or simply to adorn your clothing.
(Another related post: How to Make Profit from An Enamel Pin Business?)
2. Lapel Pin Application
Over the past century, we have seen badges transform from a means of identifying group membership to a cultural symbol. Pins are very versatile and have a wide range of applications.
- Although most often worn on the lapels of jackets, they can be trimmed with any type of material: lanyards, hats, and purses are other popular options. Often, you can identify a collector by the number of pins on their hat or jacket.
- Cork boards are a very common and easy way to display thumbtacks from your permanent collection.
For everyday use, badges are a relatively inexpensive but classic way to give team members a sense of belonging. For newcomers to societies such as fraternities or sororities, being “fixed” is a privilege. Businesses often use them to recognize top performers in the company. Here are some other examples of pins in business, social, and entertainment settings:
- There are many benefits to using custom pins for events like conventions. They can be provided to attendees as a means of identification during the meeting and as a memento after the meeting. It is not uncommon to see an experienced conference delegate wearing a row of pins on their identification tag, representing the number of years they have attended the conference. They can be handed out at conferences, as a way of advertising to potential clients or customers, or as a “thank you” token for loyal customers. Pins are also awarded at the convention to recognize special achievements at the awards dinner or luncheon.
- Charitable organizations have long used badges as a fundraising tool and symbol of the organization, which their donors wear proudly to demonstrate their commitment to the cause. Some of them, like the aforementioned red or pink ribbons, are so closely associated with causes that they’ve become almost universally recognized symbols. There are even digital versions of these ribbon symbols, some of the popular avatar badges on social networks.
- The use of trading pins in sports and entertainment also has broad implications. Notable examples of this are the special pins designed for each Olympic Games. In most cases, these pins are limited editions, available only during events, and highly sought after as collectibles. In fact, many major sports teams and sporting events have their own badge designs that fans can wear with pride to show their loyalty and dedication.
- Theme parks, restaurants, festivals, arts businesses, and music groups all benefit from the creation and sale of pins to celebrate their appeal and foster fan or customer loyalty and togetherness. Hard Rock Cafe and Disney are very famous examples.
(Another related client case: Fantasy Pin Project from USA )
3. Lapel Pin Manufacturing
No matter what type of pushpins you make for your organization, the manufacturing process is fairly streamlined and completely standardized. You’ll start with a design, either your own or one made for you by a pin maker. From there, you’ll decide what type of material and finish will be applied. The manufacturing process has several steps, and the complexity of the process depends on the complexity of the finished product. Generally, once your design is complete, it is inked and colored, then transferred to a sheet of paper marked with dimensional and functional specifications.
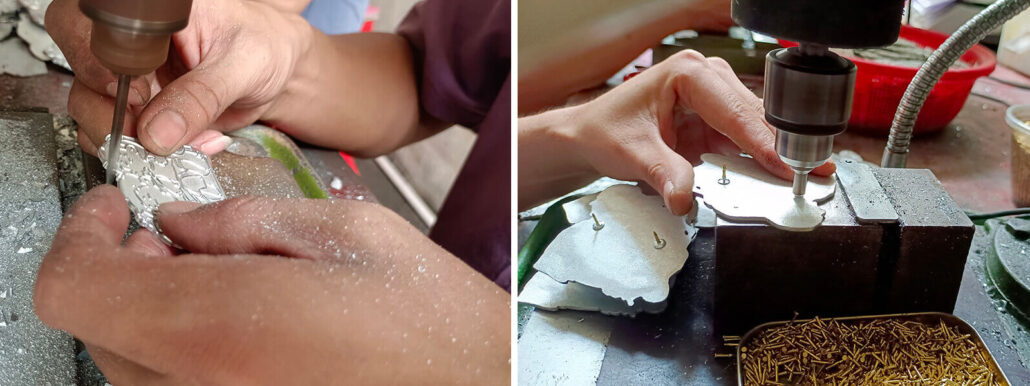
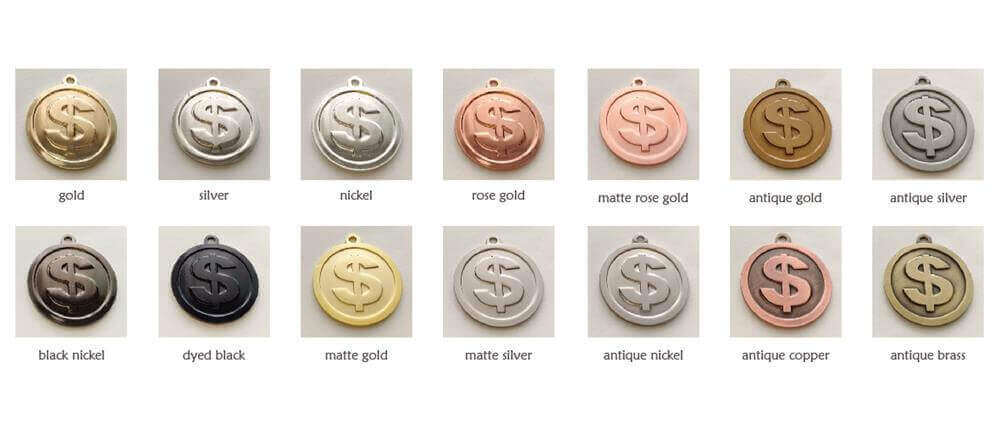
A mold is then made and cut to form the outline of the pins. A piece of metal, usually copper or brass, on which individual pins are printed. These are the metals of choice for lapel pins because they are softer and more susceptible to impact. It is especially useful for designs with a lot of detail. After the final stage, the copper or brass is plated with a more durable metal. This can be as basic as nickel, or as refined and expensive as gold, silver, or platinum.
Upon stamping all pins in a run, including the back stamping (if specified), each pin is backed with the desired material. After the plating and polishing process, the pins can be colored. Here is a brief description of the different types of materials used in the final fill and shading process. Remember, the more pins you order, the lower the price per pin. Including back stamping (if specified), the required backing is applied to each pin.
After the plating and polishing process, the pins can be colored. Here is a brief description of the different types of materials used in the final fill and shading process. Remember, the more pins you order, the lower the price per pin. Including back stamping (if specified), the required backing is applied to each pin. After the plating and polishing process, the pins can be colored. Here is a brief description of the different types of materials used in the final fill and shading process. Remember, the more pins you order, the lower the price per pin.
(Another related post: Hard vs Soft Enamel Pins: What’s the Difference?)
4. Common materials and methods to make Lapel Pin
The following are several commonly used materials and methods for making pins:
1) Cloisonne
This is a technique perfected by the Chinese. After cutting the pin, press the shape of the design into the pin, leaving raised outlines of the different colored areas. A powdered color mixture is similar to sand or frosted glass is then added to the design and baked color by color at high heat. This keeps the colors separate so they retain their brilliance. This is the highest quality and most attractive finish and many embellishments such as glitter and jewels can be added.
2) Soft enamel
This method is similar to cloisonné. The starting steps are the same, but the coloring is done by injecting soft enamel in the color of your choice into the recessed areas of the stamped design. To set the color, the block needs to be baked. The appearance is very similar to cloisonne, but the process cost is lower, and it is one of the most common finishes.
3) Crash
Create molded pins by first creating an image of your design on the die. The outline shape of your artwork is cut from a brass or copper plate, then a die stamps your design onto each pin. After stamping is complete, the workpiece is plated and polished with the plating material of your choice. This method makes your pin look like it was carved.
4) Etched enamel
In etched enamel, an acid solution is used to etch the image onto the surface of the needle, which is then handpainted and fired, then polished.
5) Offset printing
This is the best method for very intricate or detailed artwork, as well as photographic images. Using a printing method similar to magazine printing, designs are created and transferred to the base metal. There is no limit to the number of colors that can be used in the process.
6) Screen printing
This is the process of applying patches of color one at a time using either the screen printing method or the block printing method. This is the same process used to create images on T-shirts. After adding color, clean and polish the pins. In the final stage, a clear coat of epoxy is applied to protect the finish.
(Another related client case: Custom Combination Pin Badge for USA Client)
5. Options and functions of Lapel Pin
Once the design and materials have been selected, you must decide on the type of accessories required, as well as any special features such as lighting or 3D effects. You will also need to provide this information if you wish to have your pin printed on the back. You may also want to consider the following features:
1) Period
These are the charms that hang from the loop at the bottom of the pin. They can be little figures, bells or stones, and jewelry.
2) Bubbles
This is the opposite of a ring. The charm is attached to the top of the pin with a spring so it “wobbles”.
3) 3D Effect
These are usually created by bolting a pin on top of a base pin to give it a 3D appearance.
4) Flocking
This is a process that creates areas of blurred texture on the surface of the pin.
5) Slider
These pins have a movable piece attached to the bottom of the pin so that the link can slide back and forth.
6) Spinning Wheel
Spinners are pins with moving parts, with a bolt or screw passing through the center of the connecting parts, causing the attachment to spin like a pinwheel.
7) LED Lighting
A flashing pin has an area that lights up to show the numeric information you selected. A small battery connects to the back of the pin, usually just above or below the back attachment. The battery is not replaceable, so once the battery dies, the feature will no longer work.
(Another related study case: A FAQ Guide for Manufacturing and Selling of Enamel Pins)
6. Accessories Selection
The next most important step in creating a pushpin is deciding on the back attachment. Attachments are usually welded, but can also be glued in place. The final cost per pin will depend on your selection of other features. Below are the most popular pin connection options.
1) Butterfly Clutch
This is the most typical way to attach the collar pins. Due to its military origins, it is sometimes called a military clutch. It’s a small circle with a hole in the middle and “wings” on either side. When the “wings” are squeezed together, it releases the latches inside, allowing them to be removed from the prongs on the pins. Usually, there are 2 tacks and 2 clutches on the larger pin. This helps keep the pin from spinning.
2) Jewelry Clutch
This is a simple design that looks similar to a butterfly clutch but is stronger and therefore more expensive. A mechanism inside grabs the claw attachment as it is pushed into place. These are close to locking and require pulling to disengage the clutch to remove it.
3) safety buckle
This attachment looks like a safety pin and works the same. Available in different widths and sizes.
4) Magnetic buckle
This is a clasp with a magnet attached. It holds the pin in place by attracting another magnet attached to the back of the pin. This is a great option if you don’t want to damage your clothing by getting pinholes in it.
5) Nuts and screws
This is a method of attaching pins by applying small bolts to small screws attached to the back of the pin.
7. Lapel pin packing options
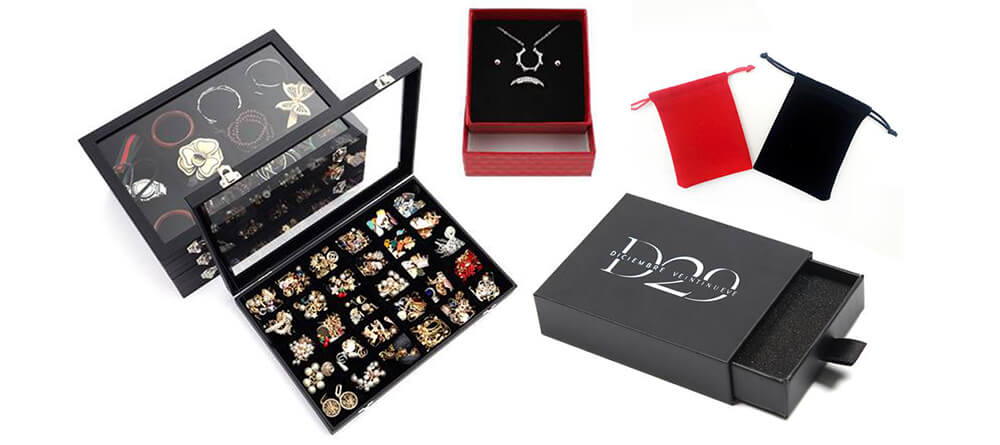
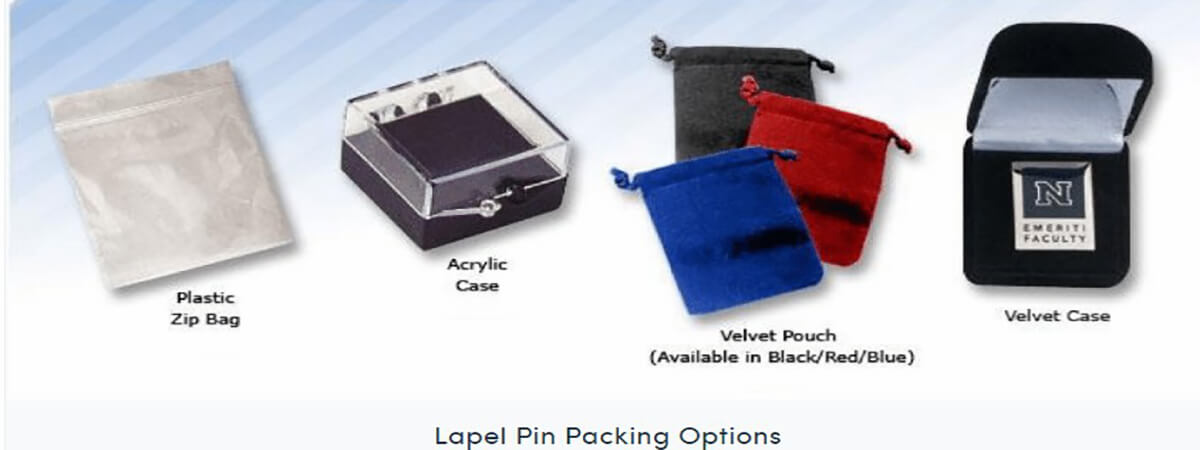
There are many different options when it comes to packaging badges. Depending on how you plan to assign the pins will depend on whether you require further packaging options. Almost every lapel pin company offers free plastic zipper bags or plastic bags. However, if you are using your pins for an event, or for customer or employee recognition, you can choose a different type of packaging.
The most common types of packaging are plastic bags, plastic (acrylic) boxes, velvet bags (with or without embossing), and velvet boxes. Below are examples of all of these.
Keep in mind that when you choose a plastic box or a velvet box, it does take up more space when transporting your items.
There is another very popular option. This is the card with the badge. You’ll notice in the example on the right that you can design a card with your message and badge. The size of the card can be decided by you.
This is a very popular option as you can add a generous message, contact information, a poem, or other inspirational message to go with your lapel pin.
8. Pin marking and back stamping
The inscription on the back of the badge usually simply states which organization the badge was created for. If the pin is a special or limited edition, it may have an inscription, date it was made, or an edition number or number of items in that edition. Another backstamp you might come across at the Associated Press. This stands for “Artist Proof”, which is an initial trial run of very small lapel pins, usually limited to about 20 pins. Some collectors prize these AP pins because relatively few were created before any alterations and mass production took place.
(Another related client case: Soft Enamel Pin Project from UAE)
9. Custom Pin Ordering Guide
Most manufacturers and suppliers have websites that list their services and what’s included in their prices. Many will offer free art design and styling as an added bonus. Here are some tips on what information to have on hand before asking for a quote, and some advice on artwork.
10. Prepare to get a quote
Before contacting the manufacturer, there are a few issues you should address so you are ready to place your order. Get a rough idea of what you want. If you don’t have a design, get a rough idea of what you want, such as size, color, or logo (if one is to be used). Find out how many pins your organization needs. Remember the purpose of the pins. Is it for employee recognition, a membership drive, a charity, or a one-time special? Know what your budget requires and stick to it. After you’ve consulted with several manufacturers and determined which one you think is best for you, they will work with you on your design, material, color, back attachment, and order size.
(Another related study case: Challenge Coins: What is It and How to Select?)
11. Best art design and detail selection
The best lapel pin art design is one that keeps it simple while communicating your message or idea to your target market. Bold designs work best because the shading method works better without too much detail, such as small or narrow areas of color.
If it’s a single pin or a small batch for a special project, you can spend a fortune improving the quality of the plated metal, or even adding crystals or jewelry. If you’re ordering in bulk for a conference or volunteer organization, you can keep it basic. If you have the time and an artistic appetite, you can design the pin yourself, or you can meet with your board to come up with a design that everyone agrees on. Some companies even hold contests between employees and their families, or between clients and the public, to help find a new logo or artistic design.
(Another related study case: What is the Price of Medals in China?)
12. Pricing Information
It depends on how many pins you need, the materials and finishes you want, and any special details you want. The more features you add in lighting, jewelry, pendants, and fine details, the more you will cost per stitch.
For basic 4-color soft enamel pins with standard butterfly clasps, you’ll pay $0.43 per pin for a small 3/4″ pin in 10,000 pins, and a larger 2″ pin in 100 pins Each pin costs $3.67. Operation. Any additional features, such as magnetic closures or more colors, add to the price, which typically starts at around $0.20 per stitch or more. As the manufacture of the pins is labor intensive, it is also time intensive. To save money, allow plenty of time to order your pins. This would eliminate rush manufacturing and shipping costs.
How useful was this post?
Click on a star to rate it!
Average rating 5 / 5. Vote count: 2
No votes so far! Be the first to rate this post.




1 thought on “Lapel Pin 101: Everything You Need to Know”
I heard about this product from one of my clients, so I try to find out what it is. I love the information I have gathered here, thanks so much, and keep up the good work. It has helped me